I'm currently working on a layout remodel project that will add new switching in several areas. Over the last couple of weeks, I've almost completed the first of these areas: adding a new coal loader.
In this "before" photo, we see a long curved hillside above and behind the signal bridge that will be the home of the new loader.
Here's another "before" photo showing the hillside and the tunnel that leads into Pittsburgh staging. I've never been happy with this tunnel since the light in the staging room is very visible, as is the cut wallboard that forms the tunnel. The original plan for the new loader was to move the hillside back toward the corner of the room a few inches and lay a new spur to the right of the mainline that could hold 2 or 3 hoppers. As you'll see, that's not what I wound up doing.
Here is the corner of the room after I removed most of the existing hillside. The hardshell is Bragdon Enterprises "Geodesic Foam Scenery" using nylon window screen and a 2-part resin. This material is easy to cut with a serrated kitchen knife or a utility knife.
Hmmm, it looks like if I go back into the hillside a little, I can squeeze in 2 tracks...
What's more, if I curve the tracks a little, cut a hole through the backdrop so the tracks can go all the way to the concrete basement wall...
(Note that the roadbed extension that goes through the backdrop has masonite sides and a sturdy plywood bumper padded with foam rubber.)
Each track will hold four 55-ton or three 70-ton hoppers. Note that I've re-installed part of the old hillside in the left of the photo.
A new skinny ridge was planned to hide most of the loader structure and especially the hole in the backdrop. Here is a pink styrofoam mockup of the ridge.
The ridge is now fleshed out and covered with brown wrapping paper secured with hot glue.
After adding foliage to the new ridge, it was time to re-use the rest of the old hillside that was cut out. Here it is being test fit into place. Note the bar clamp on the top to clip it to the hardshell above the tunnel portal.
After patching the foliage and adding some Supertrees to the top edge, the new/old hillside looks like it's been there forever.
The cardstock and plastic drain pipe coal loader mockup already looks pretty good! The tall yellow grass tufts show the location of electromagnetic uncouplers that are used when switching.
Here is another "through the trees" view of the loader mockup.
The tunnel into Pittsburgh now has a stone liner (stone embossed paper glued to 1/8" hardboard and given a heavy black wash). The tunnel interior is pretty dark due to a shading structure that I built on the other side of the wall.
Here is the shading structure in the staging room (masonite sides and roof). Please excuse the piece of cardboard in the front, I temporarily ran out of masonite.
The new coal loader area has two Tortoise switch machines and three electromagnetic uncouplers, so a small control panel was built. The new panel is just to the right of the Pittsburgh/Conway Yard/Shire Oaks panel.
The panel includes LED indication showing which track is aligned. Green indicates the main line is selected, red means one of the loader sidings is active.
Finally, here are a couple of Before and After shots. The look of the hillside was maintained even though a new structure and 7 or 8 switching spots were added. I didn't want the new loader to distract attention away from the Railway Express building in this scene.
The appearance of the tunnel into Pittsburgh has improved greatly as well.
Remaining tasks here are to add some ballast, just a little more ground cover and build the permanent loader. Fortunately, a friend has volunteered to build the structure. :-)
Creatively Bridging a Doorway (Part 1)
My basement layout room has a doorway at one end of it. The door leads into my workshop and an adjacent room that houses the main staging yards. Here is a track plan showing the doorway on the left.
Here is a photo of yours truly (several years ago) standing in the doorway. There are a pair of temporary double-track bridges shown. The upper bridge is 6 feet long and the lower bridge is 5 feet long. I already had kits to make Warren truss bridges to fit this space, so the temporary bridges were built with the proper lengths and track spacing to match the kits. Of course in my usual style, the temporary bridges were in place for about 13 years before I got around to building the kits!
The train on the lower level is on a single-track temporary bridge.
To the left of the doorway was the temporary town of Gap Junction. It is the junction between the main line (goes through the tunnel behind the station) and the branch line to Cumberland, MD that goes across the doorway on the lowest level. Gap Junction had a passenger station and a team track. I never finished the scenery here because I wasn't really happy with the area.
To the right of the doorway was the town of Franklin. The single-track temporary bridge came out onto the branch line (with light ballast). There was a team track and the large Altoona Brewing Co. further down the branch.
My original plan was to replace the station in Gap Junction with some kind of industry to be switched and to move the passenger station to Franklin. Prototypical operation is my main interest in the hobby and I'm always looking for new switching locations. The plan for Franklin (above) was to expand the benchwork by several inches on the right, put the station where the boxcar is (removing that team track) and add a new station track/team track behind the station.
These modifications would have required quite a bit of track removal and modification, and I really dislike tearing apart finished scenery.
The other part of the original plan was to expand staging in Cumberland. The branch line runs to the left of the brewery and enters a tunnel portal to the staging tracks. There were originally 2 staging tracks below the 4-track main line at Horseshoe Curve. You can see the staging tracks in this early construction photo.
By thinning and/or relocating some of the support risers for the upper level, at least one and possibly two more staging tracks could be added underneath. The problem is, the area doesn't look like the above any more, it looks like the photo below. To add the staging tracks would require removing the embankment scenery from both sides of the reservoir. Did I say that I hate tearing out finished scenery?
In the end, I was able to bridge the doorway so that passage is preserved except when the railroad is operating, Gap Junction was reworked, the passenger station was moved and THREE new staging tracks were added. None of the finished scenery was disturbed. Future posts will describe how this was accomplished.
New Blog to Supplement My Website
I have historically been pretty bad at updating my model railroad's website (www.pennwestrr.com). Updates seem to come several years apart. It's not that the railroad has stopped progressing, new things are added all of the time. It's just a pain to update the site's html coded pages to talk about them. So, I thought I'd try this blog format.
Please visit the website for layout design, construction and operating updates through 2010. I'll use this blog to describe construction changes since 2010 and to present current projects being worked on as well as operational changes to the railroad that will be coming in 2015 and beyond.
Some of the layout changes include a new (well, new relative to my website but completed a year or so ago) switching area in the town of Franklin, a new turntable in Annville Yard and a small, relatively painless redesign of the yard that lengthened some of the classification tracks.
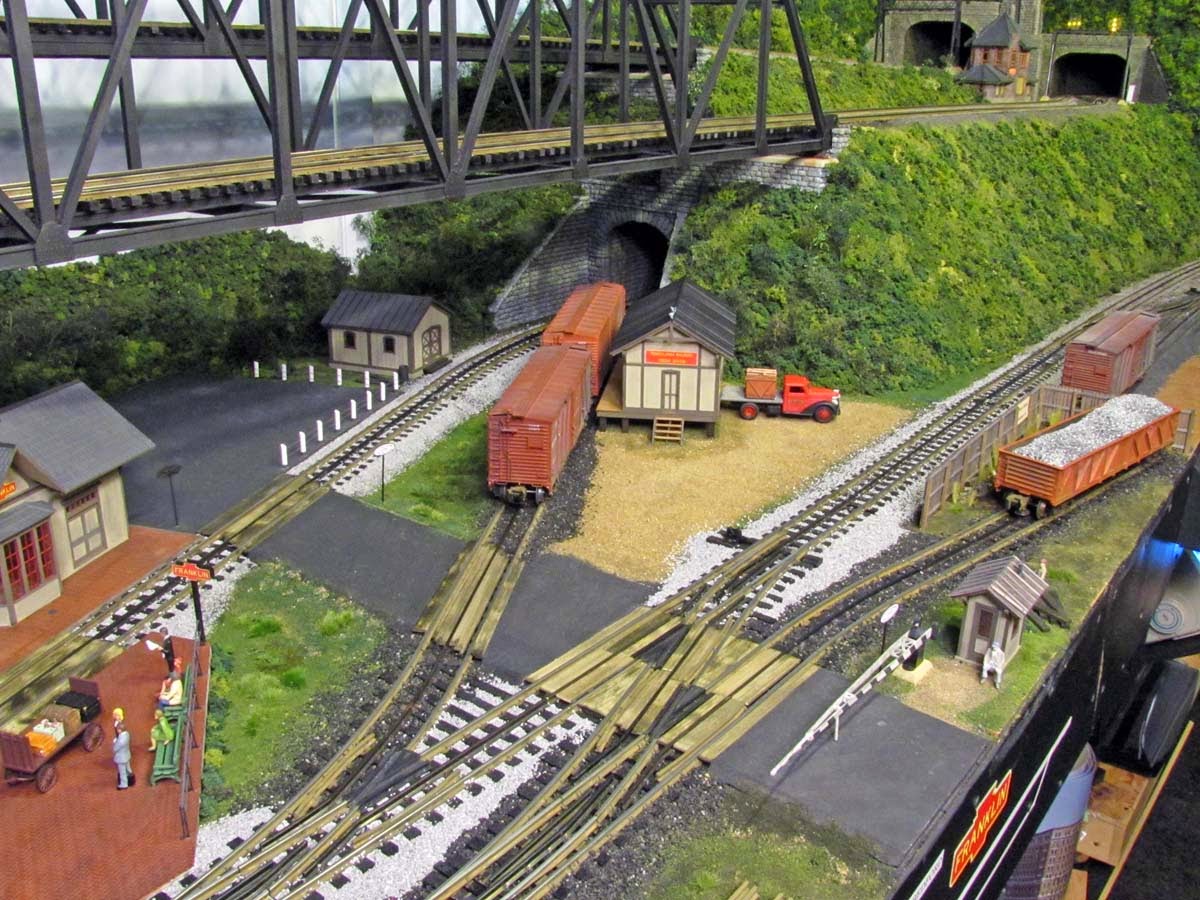
Here is the North end of the town of Franklin showing the new J. Smith Coal Co., Franklin Cold Storage on the far left (still needs a loading/unloading dock) and a holding track with loaded hopper in the foreground.
South end of Franklin showing the freight station, team track #1 (just this side of the freight station), team track #2 on the far right and Penn Metal scrap yard (with a gondola spotted). The new Franklin passenger station is on the left.
A PRR E6s Atlantic is arriving at the Franklin passenger station. The freight house is on the right. This whole area is relatively new and was not part of the original plan for this area. I'll describe the development of Franklin in the next blog posts.
I hope you enjoy reading about the Pennsylvania & Western and thanks for visiting my blog. If you're ever in the Cincinnati/Dayton Ohio area and would like to visit, please let me know.